[Posted by Steve]
In between our bursts of travel to new areas throughout the country, we like to occasionally settle down for a while to not only vegetate a bit, but also to take on some of the little projects and upgrades that have been added to our “wishlist” along the way. Of course, I do all the actual work, but only after Mona Liza gives management approval!
A couple of our most recent upgrades involved:
- Building a set of nice, strong jack blocks to assist with leveling Betsy, when needed. These blocks sit between the jack base and the ground to reduce the distance the jack has to extend, and they offer a larger area to distribute the coach’s weight.
- Installing some cool tire covers that we heard about from Gay and Joe of good times rollin. We didn’t really like our old tire covers and have been hoping to find something better.
Jack Blocks (set of 2) –
We have tried a couple of the “indestructible” jack block products available out there, which Betsy promptly destroyed. With Betsy’s rear jacks holding up close to 22,000 pounds, those products can either flex badly out of shape or aren’t tall enough to allow the jack to gain the needed additional height.

I wanted something that was tall, wouldn’t buckle, was fairly light and wouldn’t take up a lot of room in our compartment. Here’s what I did:
Each set of 2 blocks required a half sheet of 3/4″ exterior plywood. I’ve built only 2 blocks so far, to see how they work and determine if we need 2 more. The plywood can be purchased in half sheets from Home Depot, which is nice if you have a small car like ours and can’t fit a whole 4’x8′ sheet in it. While at the store, get some construction glue, about twenty 3″ galvanized or deck screws (and the bit to drive them) and 2 cheap drawer handles like the ones in the photo. That’s all of the materials, and it shouldn’t set you back more than $40.

Cut the half sheet into eight 12″x12″ squares. Stack them into 2 stacks of 4 squares and drill a couple of starter holes into each of them. Drive two of the deck screws into the holes – this step just keeps the stacks square and together while you drill the rest of the starter holes.

Drill the rest of the starter holes into the squares. I figured 9 screws on each block would be plenty, so that’s what I did.

Take the blocks apart, but be careful to lay them so you’ll be able to stack them back together the same way.
On one block, squirt or brush the construction glue liberally onto the mating surfaces of the four pieces of wood, then stack them back together as they came apart. Now screw all of the deck screws in until they are flush with the surface and wipe off the excess glue.
Assemble the other block, then install the handles. I offset my handles toward the “ground”, thinking it would be easier to pull them out with my awning rod. I’ve heard of folks attaching a length of rope to each block so they can pull it out without using a rod, but I didn’t want muddy rope that I would have to store away when it rained.


This is a simple and inexpensive project, but you will need to own or borrow a saw to cut the plywood and a drill to drive the deck screws. After several uses, my blocks are holding up well – even on uneven surfaces. Although I realize they won’t last forever, they’re so cheap and easy to make that I won’t mind doing it every few years.
Tire covers –
This upgrade requires only your wallet and knowing what size tires are on your coach.
We owned a set of typical fabric tire covers for years, but we were never happy with them. They were bulky, got dirty and full of bugs, and they allowed condensation to build up on our nice wheels in humid conditions – not a good thing over time.

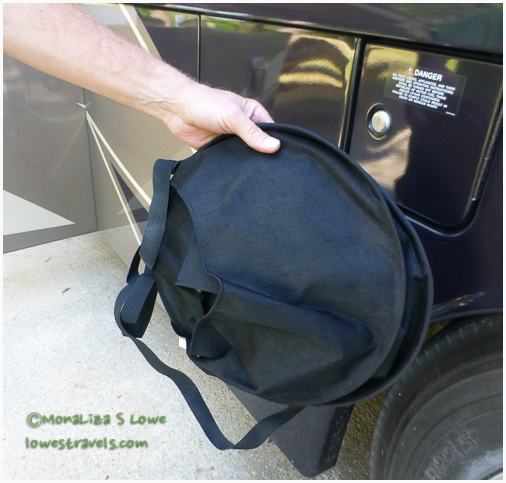
As soon as I heard that Magneshade started offering tire shades, I picked up the phone and ordered four of them. This small company makes everything custom, and the quality is excellent. We’ve enjoyed a full set of their exterior magnetic window shades for years, and these tire covers are attractive, compact, and just plain cool.


For our large 22.5″ tires, the cost was just under $200 for a set of four, shipping and tax included. It’s hard to tell they are even on our rig, and I can attest to the fact that they will stay put even in tremendous winds – as we found out a couple of weeks ago. You might want to check these folks out!
Comments
29 responses to “Blocks and Sunblocks – New add-ons for Betsy”
Wonderful mods Steve! We would never have thought of adding handles to the blocks but it makes perfect sense. Those wheel covers are just amazing. Great post Steve! 🙂
Thanks LuAnn, I made the blocks easy for my dear short little wife to grab from under Betsy.
Terry and I are quite impressed. 🙂
Move over, Mona Lisa. 😀 Give it up to Steve for an awesome instructional demonstration. This is pinterest worthy. Will share this tomorrow.
Thanks Rommel, paminsan minsan he has to do some postings. ha ha
Nice job on the blocks, I hope “management” approved! The tire covers are very snazzy, only the best for Betsy!
Brenda
Great job on the jack blocks. Paul made something very similar to those but he used an engineered beam. They work great.
We had the magna shade for our motorhome. We loved it. Paul has the tire covers on his wish list.
Both mods look great, Steve! But we all know this is because of the project manager:)
Yes, she is quite good at multi-tasking, that is, giving me multiple tasks to complete whenever possible!
We love our tire covers too! In fact Joe REALLY loves them because they are so easy to put on, that has become my job!
It was your great review that prompted us to replace our white tire covers, Gay 🙂
Great job, Steve! We just have some little plastic jack blocks — but then again, our trailer is like a toy compared to your rig. 🙂 I’d like to get a set of those tire covers — and the “magnetic window shades” caught my eye! Thanks for the great tip!
I like that I don’t have to get a ladder out to attach the window shades – just stick them up there with the pole. Hope you all are doing well!
We’re trying to stay cool as we make our way back to the west coast — not an easy task in Arizona this time of year — headed to Flagstaff today. Looking forward to reading about your adventures in the Smokies!
if you don’t have a saw buy your wood at Lowes and they will cut it for you….
Good tip – thanks. I knew they would do large cuts, but I never checked to see if they would do several for me.
Very interesting tire covers. I saw a similar set recently, but they were white and really stood out. Black is definitely the way to go. We just got rid of similar jack blocks Mui had built for the same purpose. They seemed to mess with the “home programming” of our electric jacks. I’m going to share this post with him in case he wants to revisit jack pads again in the future. In the meantime, we have the plastic jack blocks that keep the jacks from sinking when we’re on a soft site.
Thanks, now I’ll just have to see how long they hold up (or how long before I drive off without them)!
Nice mods! The jack blocks look fantastic!
Nina
Yes, strong but light enough that my darling wife can put them out while I sit in the rig and push buttons!
Clearly there’s a lot more to RV’ing than meets the eye. Those blocks look like they’re very strong.
I don’t know about you, but my upgrade list never seems to get shorter – just different…
😀
Great Job! Love the tire and wheel covers. May have to order some with all our other upgrades.
This is a brilliant share … Kudos to the constructor…
We made do with some lumber yard off-cuts. Your blocks are the Rolls Royce edition!
Yup, haven’t really jammed these down into the mud yet to see how they hold up. We would need some heavy rain for that test, and we’ve already had enough of that for a while!
Great job Steve…..the new blocks are on Al’s honey do list. He’s been wanting to make these for awhile with handles. We’ve been using cut LVL’s left over from a job site and they are starting to split. We’ll poly the next block’s he makes to hopefully minimize water deterioration.
Thanks Ingrid. Yes, strong but light enough that my darling wife can put them out while I sit in the rig and push buttons!